Monday 27 February 2012

Liz Taylor Inspired Retro Classic Look

I recently saw "Cat on a Hot Tin Roof", based on the play by Tennessee Williams. I was disappointed by the censorship in the film, but not my the makeup that William Tuttle did! I chose not to shade in the crease like Liz Taylor had in the movie, and I went for a darker lip colour. But the winged liner and lashes, glowy cheeks, red lips and strong arched brows are my favourite part of this classy look.

Loooove the classics!
 Closeups...
Eye of the  ball
 Notice the awesome lash inserts I used to elongate the liner even more.

Da lip.

Kissy face?!!?!
Products Used

Face:
-Urban Decay De-Slick in a Tube (T-zone)
-Lancome Teinte Miracle Foundation in Bisque 7 (all over face and over eyelids)
-Bobbi Brown Tinted Eye Brightener in Bisque (under eyes)
-Cover FX Full Coverage Cream Foundation (under eyes)
-Laura Mercier Matte Translucent Powder
-Nars Orgasm Blush (peachy glowy blush)
-Tarte Amazonian Clay Bronzer (all over contour)
-Nars Albatross (golden shimmer on tops of cheekbones)

Eyes
-Inglot Eyeshadow #30 (light shimmery peachy gold on the browbone and inner corners)
-Inglot Eyeshadow #406 (shimmery bronze on the lower lashline)
-Rimmel Glam'Eyes Black Liquid Liner (cat eyeliner)
-Revlon Grow Luscious Mascara
-Quo Lash Inserts (outer lashes, and I cut some of them shorter toward the middle of my eye so they blended with my natural lashes)

- Maybelline Superstay Gloss #550 (most awesome burgundy wine red, unfortunately discontinued!!! :( whyyy)
-Buxom Plumping Lip Polish in Krystal

Hope you like this retro look!

Please send any requests to lizziehanley94@yahoo.ca

Sunday 26 February 2012

Bronze Smokiness

Hello. So this is not my favorite way to do a bronze smoky eye, but I was getting compliments on it all day long, so I took some quick pics.

To challenge myself, I used mainly loose eyeshadows which are more difficult to apply than pressed shadows.

Forgot an inner corner highlight, silly me

Closeup on zee eyeballz

Shimmery lips
This is basically a cut-crease smokey eye where the deep colour is taken all the way into the inner crease. I rarely do that with crease colours because it makes my eyes look more sunken in than they already are. If your eyelids are flatter, then this would be a fantastic way to do a dramatic smokey eye that is not just super heavy on the outside of the eye.

Products used

Face:
-Lancome Teinte Miracle Foundation in Bisque 7
-Bobbi Brown Tinted Eye Brightener in Bisque (inner part of the under-eye area)
-Cover FX Total Coverage Cream Foundation in #M40 (under eyes)
-Laura Mercier Matte Translucent Pressed Powder
-Tarte Amazonian Clay Bronzer in Park Avenue Princess (as a contour: just under cheekbones, at the temples, hairline, and jawline)
-Nars Orgasm Blush

Eyes:
-Urban Decay Primer Potion
-MAC Tan Pigment (peachy shimmery champagne colour applied wet to the main eyelid area)
-MAC Roasted Chestnut Crushed Metallic Pigment (deep shimmery bronze etched along the crease and lower lashline)
-Urban Decay Buck and Naked (soft matte brown to blend out the crease and lower lashline)
-Inglot eyeshadow #351 (matte cream colour swept along the browbone)
-MAC Carbon Eyeshadow (matte black along the upper lashline)
-Makeup Forever Aqua Eyes Eyeliner Pencil 0L (black liner in upper and lower waterline)
-L'Oreal Volumizing Carbon Black Mascara

Lips:
-Nars Lip Gloss in Orgasm

Hope you like!

Please send any requests to lizziehanley94@yahoo.ca

Tuesday 21 February 2012

Look More Awake

There is a bug going around. I happened to catch it along with everyone else I know.
I woke up this morning feeling and looking absolutely awful, but thanks to a few tricks, I was able to hide it a bit without spending more than 10 minutes getting ready!

Look alive, pretend you're not sick!
I did not want to overdo the concealer under my eyes because I think you should be seeing the person, not the makeup, not the cold.

10 tips on looking more awake:
  1. Make sure all of your makeup is completely removed at night.
  2. Wear less foundation so your skin looks more like skin. Focus on moisturizing well.
  3. Concentrate concealer on spots that need it most... pimples, under-eye circles.
  4. Do not apply makeup around your nose if you will be using lots of tissue. A little Vaseline at night will help with the redness and dryness and you won't feel like you need to apply so much makeup.
  5. Apply a light eyeliner pencil to your waterline (white or flesh-toned) to open up the eyes.
  6. Add a light colour to your inner corners for more light and drag it slightly up to orbital bone to eliminate darkness there.
  7. Do not wear a lot, if any, darker makeup on the bottom of the eye. It will draw attention to dark circles.
  8. Concentrate definition on the upper lashes to lift tired eyes. A winged eyeliner (angled upwards, never down) will help with this.
  9. Apply a blush with a little bit of shimmer to it so your cheeks glow rather than look dull. Or, use a highlight along with your blush.
  10. Avoid heavy contouring of any kind... face, eyes, anything.
Products used:

Face:
-No foundation
-Cover FX Full Cover Cream Foundation # M40 (used as concealer on a few acne scars and dark circles)
-MAC Mineralize Blush in Dainty (a rosy blush with gold shimmer)
-Laura Mercier Matte Translucent Powder (all over face for even texture)
-MAC Eyeshadow in Charcoal Brown (eyebrows)

Eyes:
-Bobbi Brown Gel Eyeliner in Denim Ink (upper lashline)
-Body Shop Duo Mineral Eyeshadow in Sapphire (I used the sparkly navy colour on top of the eyeliner for fun)
-NYX Jumbo Pencil in Milk (lower waterline, inner corners)
-Laura Mercier loose shadow in Folie Blanche (inner corners on top of pencil)
-L'Oreal Carbon Black Mascara

Lips:
MAC Lipstick Viva Glam VI (a shiny medium plummy pink similar to my natural lip colour, only better)

Please send any requests to lizziehanley94@yahoo.ca

Monday 20 February 2012

My MAC Pigments

Pretty much every makeup company I can think of sells some kind of concentrated loose eyeshadow. They can be used on the eyes, cheeks and lips depending on how you work them. Pigments are very versatile. I have a few... Some Sugarpill, Inglot, Laura Mercier, Bare Escentuals, Annabelle, and of course, MAC!

These are the MAC pigments I own, excluding the stack of 4 I got from the Dazzlesphere collection.
One of them is not a pigment, but a glitter. Some of them are in the older, larger packaging. The new jars are unfortunately smaller and are sold for the same price even though they contain much less product.

This is what MAC has to say about this product:

Pigment is a highly concentrated loose colour powder that contains ingredients to help it adhere to the skin. Create a subtle wash of colour or an intense effect. Does not streak or cake. Easy to blend and long-lasting.

I have Copper Sparkle, Tan, Fuchsia, Reflects Blackened Red, and Steel Blue. All swatches are done without a base, but the "wet" swatches are used with eye drops.

Copper Sparkle, Tan
Copper Sparkle
Tan
Copper Sparkle, shimmery copper tone more orange than a penny
Tan, a shimmery medium champagne colour
Copper Sparkle swatched dry on the left, wet on the right
Tan swatched dry on the left, wet on the right
Fuchsia, Reflects Blackened Red, Steel Blue
Fuchsia
Reflects Blackened Red
Steel Blue
Jars are misleading... Look at all the extra space on the sides!
Fuchsia, a bright shimmery pink (cloudy picture, I know)
Fuchsia swatched dry on the left, wet on the right
Reflects Blackened Red, a deep wine glitter
Reflects Blackened Red swatched dry on left, wet on right
Steel Blue, an intense mermaid teal with gold shimmer
Steel Blue swatched dry on left, wet on right
I just love these. It takes a bit of practice to work with them but once you figure out the best way to make them work for you, you will cry of joy like I do every time I put on my makeup.

These retail for 24$ at www.maccosmetics.com and at MAC stores and counters.

Please send any requests to lizziehanley94@yahoo.ca

Sunday 19 February 2012

Glittery Lilac and Taupe Nails

Hello!
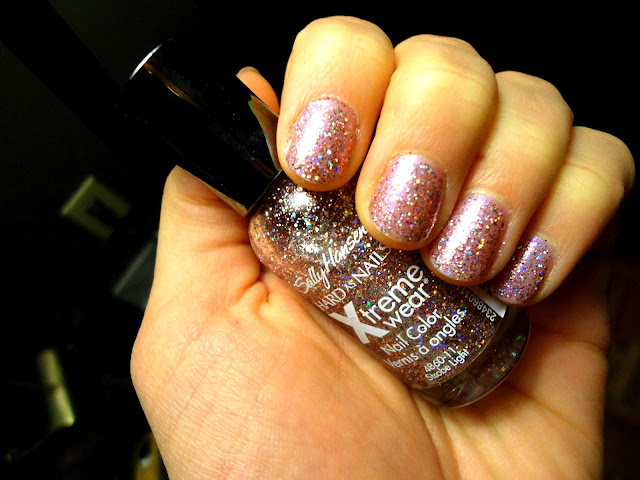
I painted my nails today, and I thought it would look nice to layer a cool-toned light purple with a sheer taupe glitter. Try layering different polishes in your collection for a different look!

I really liked how this glitter polish looked with a lavender undertone.
Hah! Try saying that 5 times fast! Lavender undertone lavender undertone lavender undertone lavender undertone...

Closeups!

Sally Hansen Nail Polish in Violet Sparks

Sally Hansen Nail Polish in Strobe Light
Hope you like! Try something new :)

Please send any requests to lizziehanley94@yahoo.ca

Thursday 16 February 2012

Pinup on Redheads

This is Amanda. She is gorgeous.
I decided to do a simple, timeless look on her that could suit practically anyone, if it is tweaked a bit for different skin tones.
She had some makeup on already that I had to work around.
Cellphone was all we had for pictures.

Gorgeous!!!

Looking down
 Closeup!
Because Kanga-Rouge is actually that awesome!
Ok so I love this lipstick! Red looks fantastic on reds! Unfortunately, Kanga-Rouge was limited edition from a MAC collection a few years ago called Dame Edna. It was re-promoted this year but I did not know about it. A close dupe is MAC's MAC Red.

Products Used:

Face: 
-Benefit Boi-ing concealer #01
-Nars Orgasm Blush

Eyes:
-Urban Decay Primer Potion
-Inglot Eyeshadow #351 (cream colour all over eyelids)
-Urban Decay Naked Palette:
  • Buck (traced along the crease, outer lower lashes)
  • Naked (to blend Buck up a bit)
-NYX Jumbo Pencil in Milk (inner corners, waterline)
-Inglot Eyeshadow #496 (sparkling white, inner corners on op of NYX pencil, browbone)
-Rimmel Glam'Eyes black liquid liner (sort of cat-eye shape)
-Whatever mascara she was already wearing

Lips:
-Revlon Black Cherry Lipstick (outer corners of mouth, and slightly around lips shape)
-MAC Kanga-Rouge (THE best red ever. All over lips)

Amanda should model. Non?

Please send any requests to lizziehanle94@yahoo.ca

Sunday 12 February 2012

Anti-Valentine's Day Smoky Craziness

I had some friends over last night. And as I always do when Olivia and Amanda come over, I attacked their faces!
Here is some fun I had with Olivia's face. She wondered what an intense black smoky eye would look like on her.
Forgive the cell-phone quality pictures.

Olivia is soooo pretty!

I went nuts with her lips...
Awesome Lips

Twice!
AWESOMEEE LIPS
Closeups...

Awesome Smokiness
Then she mentioned leopard spots.

Spots!
Then stars!
Stars!
Now I am aware that this may not be your chosen makeup look for this Valentine's Day but if you want to have a girl's night out, play up for favorite feature and have fun! 

Products Used:

Face:
-Benefit Boi-ing Concealer #01
-Tarte Parke Ave. Princess Bronzer

Eyes:
-Urban Decay Primer Potion
-MAC Blackground Paint Pot (all over eyelid)
-Urban Decay Eyeshadow in Mushroom (inner half if the lid)
-Inglot Eyeshadow #65 (black on the outer corner and crease, and lower lashline)
-Inglot Eyeshadow #460 (meduim grey-plum to blend out crease and lower lashes)
-Lise Watier Loose Eyeshadow in Folie Blanche (shimmery white, inner corners, browbone)
-Revlon Colorstay Black Eyeliner (waterline)
-Rimmel Glam'Eyes Black Liquid Liner (upper lashline)

Lips:
-Revlon Super Lustrous Lipstick in Va Va Violet (dark purple to outline the lips and blend towards to center)
-MAC Amplified Lipstick in Kanga-Rouge (Crazy Awesome Red!)
-The same concealer on the outer corners of the mouth

Have fun, happy Valentine's Day!

Monday 6 February 2012

Neutral Daytime Eyes with a POP of Colour

Hello people.
So I did my makeup like this because I wanted to keep it neutral.... But I can rarely avoid colour altogether!

Green!
 Closeup...
GREEEENN!!!
 This is a really basic eye makeup look with a bright green eyeliner just in the lower waterline. It's a quick and simple way to amp up your eyeball routine without looking like a drag queen, although I like doing that too...

Ahh, so nice!
Products Used:

Face:
-Makeup Forever Mat Velvet+ Foundation #35
-Bobbi Brown Tinted Eye Brightener in Bisque (under eyes)
-Cover FX Full Cover Cream Foundation # M40 (on top of brightener)
-Laura Mercier Matte Translucent Shine Control Powder
-Tarte Amazonian Clay Blush in Dollface

Eyes:
-Urban Decay Primer Potion
-Urban Decay Naked Palette:
  • Sidecar (on the whole eyelid)
  • Hustle (in the crease)
  • Virgin (browbone and inner corners)
  • Darkhorse (on top of upcoming brown eyeliner)
-Inglot Gel Eyeliner #85 (lime green awesomeness in the waterline)
-Gosh Velvet Touch Eyeliner in Copper Girl (upper lashline)
-Maybelline Volum' Express One-By-One Mascara in Blackest Black

Lips:
-Dior Addict Ultra-Gloss in Flash

Hope ya like it! I will indeed be doing an anti-Valentine's Day look soon. :)

Please send any requests to lizziehanley94@yahoo.ca

Thursday 2 February 2012

Sultry Valentine's Look

This is the last look I am posting for Valentine's Day. Again, the inspiration for the colour scheme is blatantly obvious. Perhaps I will post an anti-Valentine's Day look...

I had massive amounts of trouble getting decent lighting for these, and the focus of the camera was non-existent. So forgive the horror of my face that you are about to see... with a pink smokey eye! :)
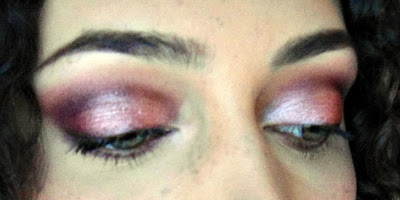
Blurry :(
 I am experimenting with foundations at the moment... I have come to the conclusion that I hate foundation pretty much altogether, aside from the first hour I wear it. Seeking a solution.

Kissy Face!
 Closeups...
Looking down

HellOO.
Products Used:

Face:
-Makeup Forever HD Foundation # 110
-Lancome Teinte Miracle in Bisque 7
-Makeup Forever Mat Velvet+ Foundation #35 (all 3 mixed together)
-Bobbi Brown Tinted Eye Brightener in Bisque (under eyes) 
-Cover FX Full Cover Cream Foundation in M40 (under eyes)
-Laura Mercier Matte Translucent Shine Control Powder
-Tarte Amazonian Clay Blush in Dollface
-MAC eyeshadow in Charcoal Brown (brows)


Eyes:
-Urban Decay Primer Potion
-MAC Dazzlesphere Crushed Metallic Pigments in Berry Ornament...
  • Rose Light used wet all over the eyelid
  • Spicy Smoke used wet on the outer half of the eyelid
  • Roasted Chestnut in the deep crease of the eye and lower lashline
-Inglot Eyeshadow #48 (dusty rose colour to blend out the brown MAC pigment)
-Revlon Colorstay Black Eyeliner (upper lashline, with the brown colour over it)
-L'Oreal Voluminous Carbon Black Mascara

Lips:
-NOTHING! I FORGOT!

Sidenote: Overall, I'd say this particular blog post is a failure. I could not get decent pictures all by myself, and i didn't even remember to put anything on my lips.
Happy Valentine's Day, Liz. Take your Iron pills.

Anyhow, I posted it because I liked how the makeup turned out.
Ok bye now!

Please send any requests to lizziehanley94@yahoo.ca